Jekyll2022-05-08T16:58:05+02:00http://localhost:4000/feed.xml/var/log/journalThoughts, stories and ideas.Gaël Foppolome@gaelfoppolo.comMagical Objective-C entrypoint2020-12-06T07:00:00+01:002020-12-06T21:06:35+01:00http://localhost:4000/magical-objective-c-entrypointLast week, I had to upgrade an old project from Swift 3. The Xcode migrator tool upgraded automatically all the codebase, without any issue. Yet, when running the app, I noticed a small problem: the layout of a particular screen was completely screwed.
The screen was a simple UICollectionView and was displaying items correctly before the migration. The issue was obviously from the Swift 3 to 4 migration. But no code related to that screen had been translated.
While trying to understand what could happen, I began to read about the changes between Swift 3 and 4, hoping that it could point me in the right direction. One aspect was the deprecation of @objc inference and as you might guess, this was the starting point of the issue.
Swift @objc inference
To improve Objective-C interoperability, the Swift compiler conveniently infers for you a lot of @objc making your Swift classes, methods and properties available to Objective-C. Even when you don’t want it. This was true up until Swift 3. Starting Swift 4, the compiler team decided to limit this behaviour and infer only for a handful of cases, for several reasons.
When upgrading to Swift 4, Xcode warns you about this evolution and lets you choose between two options: minimize the inference or match Swift 3 behaviour. The former is recommended and was used in my case.
Back to our issue. Looking closely to the Issue Navigator, I noticed a couple of runtime warnings.
implicit Objective-C entrypoint -[MyApp.MyCollectionViewController collectionView:layout:sizeForItemAtIndexPath:] is deprecated and will be removed in Swift 4
So this had to do something with the inference. By using a breakpoint, I saw that collectionView:layout:sizeForItemAtIndexPath: was never called after the migration.
Debugging implicit Objective-C entrypoint
Fortunately, the compiler team thought about that and provided an environment variable to set in your scheme to help you identify the issue. SWIFT_DEBUG_IMPLICIT_OBJC_ENTRYPOINT can take three values:
1: will log the same message as above in the console
2: same as 1 + will provide a backtrace
3: same as 2 + will crash the application
In my case, the value 2 is enough to understand the issue, but it is recommended to use the latest value after a migration while running tests.
Going back to the guilty class, MyCollectionViewController. The Swift Language Runtime tells me that the method sizeForItemAtIndexPath is found but cannot be called because it is not exposed to Objective-C.
I could add an @objc to the method and call it a day, but this does not feel right.
A deeper issue
The first thing to fix is the name. sizeForItemAtIndexPath is the old Swift 3 name, so I renamed it to sizeForItemAt.
sizeForItemAt is part of UICollectionViewDelegateFlowLayout and MyCollectionViewController uses a custom flow layout but does not declare its conformance to the flow layout delegate protocol. Since this protocol does not require anything (all method are optional), there are no compiler error or warning.
This was the root issue. A missing protocol conformance to UICollectionViewDelegateFlowLayout. Using the Swift 3 compiler, the method was automatically exposed and so found at runtime. Using the Swift 4 compiler, the method is not exposed and it’s like we did implement it at all.
]]>Gaël Foppolome@gaelfoppolo.comImproving your debugging experience with LLDB2020-03-11T07:00:00+01:002020-03-11T18:32:52+01:00http://localhost:4000/improving-your-debugging-experience-with-lldbLLDB, which stands for Low Level Debugger, is the default debugger in Xcode and a powerful ally when it comes to inspecting and analyzing the program state in a controlled environment. Engineers can better understand how the program behaves, isolate and reproduce troublesome pathways, make assumptions and apply hypothesis. All of this, on-the-fly, without the burden of having to recompile.
This last point is extremely important for large codebases. When the program takes several minutes to compile, even for small changes, one can quickly lose patience.
Because Xcode provides a great abstraction for the most used LLDB commands (adding a breakpoint, stepping over calls, ect.), most of the time, only a small fraction of its abilities is in fact, known and used.
Let’s take a look at some basic commands, which will give some super debugging powers.
Evaluating an expression
The most used feature of LLDB is the evaluation of expressions on the current thread.
Using the expression command, you can query or change the state of a property to alter the final output of the program.
The derivated forms of this command are well known.
expr and e are aliases for expression
p, an abbreviation for expression -
po, an abbreviation for expression -O --
(lldb) expression -- print(myVar)(lldb)expr-- debugPrint(myVar)(lldb) e -- myVar ="myString"(lldb) p myVar ="anotherString"(lldb) po myVar
Inspecting the state
The second most used feature of LLDB is the inspection of data on the current stack frame.
Using the frame command, you can query the state of a property in the call stack.
I will focus on the subcommand frame variable, which show variables for the current stack frame.
Several derivated of this command are also well known.
the standard var and v, abbreviations for frame variable
vo, an abbreviation for frame variable -O.
(lldb) frame variable myVar
(lldb) var myVar
(lldb) v myVar
(lldb) vo myVar
Note that using frame variable (or its other forms) is more efficient than expression to perform a simple inspection, since it uses memory reads directly, rather than evaluating an expression. When using po, you are evaluating the object as an expression. Be aware of the potential side effects.
Controlling the execution flow
Another crucial aspect of debugging is the ability to control the execution flow of the program.
Using the thread command, you can achieve almost any move you want.
As said earlier, Xcode already provides some graphical abstraction for some of its subcommands (next, step, ect.), I will focus on one not widely known.
thread jump set the program counter to a new address. With this command, you can skip a section of the program, which can be interesting to access a particular point of the program.
As usual, some derivated forms of this command exist; jump or j is easier to remember and use.
Let’s assume our program paused and we want to skip two lines ahead.
By doing this, the program may enter in an unstable, potentially unknown, state, since this alters the correct execution flow of the program. Be aware of the consequences.
Breaking and watching
To control the execution flow, engineers often need to first interrupt the execution, to better understand it. That is what breakpoints are meant for.
LLDB provides numerous subcommands and options to list, set, modify or delete breakpoints.
One is yet poorly known, the ability to run additionals commands when you hit a breakpoint; you can either add LLDB or Python commands and completely change the execution flow of the program with only breakpoints. See the command breakpoint command to further explanations.
Let’s also mention watchpoints, which are a special type of breakpoint. Watchpoints act as monitors, they will be trigger when the value of a variable changes. This is very useful to identify the culprits of the side effects when the program has state issues.
Going further
Before concluding, let’s name some specific commands that you might find useful in some extreme cases. Better to know they exist, if someday you need them.
It is recommended to understand the calling convention of the CPU you are using (AArch32 or AArch64 architecture on iPhone), to fully understand what you are doing.
Assembly
With the disassemble command you can disassemble specified instructions and get the assembly code.
CPU
With the register command you can read and write directly into the registers of the CPU.
Memory
With the memory command you can read and write directly into the memory. Make sure you are allowed to access the memory space you are operating with.
Conclusion
We only saw the small part of LLDB power and yet, when used correctly, these common LLDB commands will greatly increase your productivity, allowing to change and inject code. Mixing them with more advanced ones, and you will not feel the need to compile again.
]]>Gaël Foppolome@gaelfoppolo.comSimulating remote push notifications2020-02-07T07:00:00+01:002020-02-07T08:56:59+01:00http://localhost:4000/simulating-remote-push-notificationsCurrently, when I want to test a part of an app involving a remote notification, I only have one choice: using a real device and the Apple Push Notification service (APNs). To send a notification, we need an APNs device token, which is a globally unique token that identifies a device to APNs.
And this is painful for several reasons: we need entitlement, certificate (.p12) and to rely on APNs.
You can’t test locally, we need Internet access.
I used to work with NWPusher or lola, small tools, to achieve that purpose.
And I still will use them, but now we have a better one.
Starting Xcode 11.4, it is now possible to simulate remote push notifications directly within the Simulator.
All the pain points listed above are now gone as it happens locally.
The best way is to use the simctl command-line tool, that provides the interface to use Simulator programmatically.
This is the device UUID on which we will send the notification.
You can either specify the UUID or booted.
To find the UUID of your booted Simulator, xcrun simctl list | egrep 'Booted'.
Bundle identifier
This is the APP_PRODUCT_BUNDLE_IDENTIFIER.
You can specify the bundle identifier as an argument.
We can also omit the bundle identifier by specifying it in the payload under the Simulator Target Bundle key.
{"aps":{"alert":{"title":"My title","body":"This is a test",}},"Simulator Target Bundle":"com.gaelfoppolo.SimulatingRemoteNotifications"}
xcrun simctl push booted payload.json
Simulate remote push notifications]]>Gaël Foppolome@gaelfoppolo.comHandling the @unknown2020-01-12T20:25:00+01:002020-01-12T20:28:21+01:00http://localhost:4000/handling-the-unknownThis week, I’ve been working on improving the code coverage of an iOS application.
One of the scenarios I’ve been testing involved an enum, with a handful of cases.
Eager to maximise my coverage, I created several test functions to cover them all.
Unfortunately, during this process, I’ve made a mistake, leading to a crash of my application when running these new tests.
Luckily, this is a happy mistake, which prevented me hours of research.
Let’s see what happened.
The Mistake
My enum is defined quite simply, this is a C-style enum with three cases.
At some point in my scenario, I instantiate my enum using init(rawValue:) and I switch over it, handling each of the three cases.
When writing my tests, I made a typo leading to an instantiation of MyEnum with the value of -2. This worked.
After some digging, I understood why. Formally, Objective-C allows storing any value in an enumeration as long as it fits in the underlying type. Since -2 is an integer, it works here.
The crash happens when I switch over this value. Since I handle only the “declared” cases of the enum, the program traps at runtime. My non-frozen C-style enum is the culprit.
The Solutions
My project still uses Swift 4, an element I forgot to mention earlier.
This is why no diagnostic is produced by the compiler, either warning or error.
To handle this, we have three solutions.
Catch them all
To catch this, we can include a safety net, a way to safely handle unexpected cases, for example, future ones.
Since my switch is exhaustive, this solution takes the form of adding a default case. And this works.
However doing this, we produced another unwanted side effect. Imagine if I choose to add another case to my enum, MyEnumFour(4). The compiler will no longer produce a diagnostic error, stating that this new case is not explicitly handled in the switch, since the default already handles it.
To remedy that, we can use @unknown default. This solution combines a catch-all and also alert us if all known elements of the enum have not already been matched.
Froze them all
Enums come in two forms: frozen (NS_CLOSED_ENUM) and non-frozen (NS_ENUM).
Another solution is then to choose using a frozen enum. The compiler will recognize this and will not ask to implement a default case.
But there is a catch.
You are making a promise. The promise your enum will never change in the future.
You still can add new cases to a frozen enum, but you are breaking that promise.
And the consumers of your enum will remember that, believe me.
Of course, you can only choose this solution if you’re in control of the enum.
For example, you can’t choose this solution for an enum of Apple.
Update them all
Since Swift 5 (SE-0192), the diagnostic take the form of a warning.
Where this diagnostic will be raised, you can add @unknown default to handle the unexpected cases.
Be advised, no diagnostic will be produced if your enum already has a default case.
]]>Gaël Foppolome@gaelfoppolo.comName mangling2019-07-29T20:46:00+02:002019-10-01T23:23:09+02:00http://localhost:4000/name-manglingDuring our iOS debugging sessions, we have to search though infinite stack traces, hopefully to find some evidence. We all do this. But on some occasions, we may stumble upon some cryptic strings like, looking like this.
This is the result of the object code, and is called name mangling. The good news is, Xcode embed a tool to retrieve the original form. But first, let’s dive a little into the concept.
A unique symbol
In computer programming, when we wish to compile our program, the compiler goes by a numerous steps before producing a working executable file. The last step involves the linker, which will try to resolve all the references of the entities previously compiled (object code), and merge them into your executable file.
Unfortunately, nowadays, our programming languages evolved and supported a ton of great features such as function overloading or namespacing. But these two features make the life of the compiler impossible. How can he know which implementation link at compile time?
We humans do not even have unique name. Odds are there at least one other person who has the same name as you on this Earth. If you have a common name, the odds are skyrocketing. How can we differentiate you from the others you? With others contextual information, such as current location, birth place, etc.
Same applies in programming. Name mangling solves the problem. With this technique, the compiler encodes additional information on the function (think metadata), creating a unique name for it.
For example, dSYM files contain theses mangled symbols.
What are the rules?
Let’s take a quick closer look on how this works for Swift. If you ever wrote a parser, it will be easy. You just have to know the rules.
]]>Gaël Foppolome@gaelfoppolo.comA new era: handling locales in calendars2019-05-05T23:36:00+02:002019-10-01T23:21:07+02:00http://localhost:4000/a-new-era-handling-locales-in-calendarsThe vast majority of countries use the most widely known calendar, the Gregorian calendar. However, some locales use another calendar for various reasons. Japan is one of them.
The Japanese imperial calendar is quite unique. It is based on the legendary foundation of Japan. The calendar works like the Gregorian, except for years. Years are based on the reign of the current Emperor. When a new emperor access power, years go back to one. With each new emperor, a new era begins.
For example, this piece of code will show 平成31年5月5日. Which is wrong. Why?
The Hensei era (平成) ended the 30/04/2019 and a new one began the 01/05/2019, the Reiwa era (令和). The corretc displayed date should be 令和1年5月5日.
The fact is, with these non-deterministic calendars, software manufacturers need to update their system with this new era to support it. For example, Apple issued the following in their latest beta software:
Support for the Reiwa (令和) era of the Japanese calendar, which begins on
May 1, 2019, is now available. The first year of Japanese-calendar era
is represented as “元年” (“Gannen”) instead of “1年”, except in the
shorter numeric-style formats which typically also use the narrow era
name; for example: “R1/05/01”. (27323929)
At the moment I do not own a device with either of these betas, so I could not verify the update.
Atypical calendar localization
The Gregorian calendar also uses eras, except it doesn’t change often. It’s the same for 2019 years, and counting : AD (Anno Domini).
Since the imperial Japanese calendar heavily relies on eras, we need to take that factor in account when building our products.
Let’s go back to our previous example. The code uses the predefined format styles for dates property provided by Apple, dateStyle. This property already considers the specifics of each calendar to display a properly formatted date.
Based on the values of the dateStyle and timeStyle properties, DateFormatter provides a representation of a specified date that is appropriate for a given locale.
— DateFormatter (Apple Documentation)
Calendar / Locale
ja_JP
en_US
Japanese
令和1年5月5日
May 5, 1 Reiwa
Gregorian
2019年5月5日
May 5, 2019
However, what happens when we want to use our custom format without considering the locale ?
We do this using the dateFormat property. Replace the instruction containing dateStyle with the following:
dateFormatter.dateFormat="dd/MM/yyyy"
Calendar / Locale
ja_JP
en_US
Japanese
05/05/0001
05/05/0001
Gregorian
05/05/2019
05/05/2019
We broke the era display. It only works for the Gregorian calendar. We don’t know what first year of which era we are talking about. We could use the following date format dd/MM/yyyy G to display the era, but it would be ugly on Gregorian dates.
Conclusion
The only time you’re allowed to use a custom dateFormat is when you work with fixed format date representations, such as timestamps (RFC 3339).
In any other case, especially if the date will be displayed to the user, you should use the dateStyle and timeStyle properties.
Japan is not the only country with another calendar (China, Thailand, India, etc.), so let’s keep the dates simple!
]]>Gaël Foppolome@gaelfoppolo.comAuto deploying my website using Travis CI2019-04-16T00:00:00+02:002019-10-01T23:17:24+02:00http://localhost:4000/auto-deploying-my-website-using-travis-ciSince I set up this blog, I wanted two things: owning my data and remove any unnecessary manual operation. Using Jekyll, I already achieved the former. Let’s achieve the latter in 50 lines of code.
While figuring things out, I decided to document my solution, so that others could do the same, without the burden part.
Continuous Deployment
Continuous Deployment is the practice of deploying small changes frequently — rather than deploying a big change at the end of a development cycle. For example, GitHub deploys into production about 80 times a day.
The goal is to build healthier software by developing and testing in smaller increments. The same apply to content delivering.
Say hi to Travis
Travis CI is a free Continuous Integration service for building, testing and deploying your GitHub projects. The service is free for open source repositories.
Travis allows us to have reproducible and clean builds, notifications, conditionals and a lot more. This is exactly what I want.
Workflow
Our workflow will be simple, a single job with several phases.
Configuring the job
Installing the dependencies
Building the site
Deploying
Configure
To tell Travis CI what to do, we have to declare a .travis.yml file. Begin to fill it with the following content.
This is quite self-explanatory. We want to use macOS, our project is Ruby based and we wish to have email notifications. That our environment.
The first phase also takes place, before installing our dependencies, we make our Gems up-to-date.
Install
Next up, we install the dependencies.
install:-bundle install
Build
In this phase, we build our website.
First, we declare a new type of environment variable. This one is located inside the .travis.yml file, because there is no sensitive information. JEKYLL_ENV is a Jekyll variable, JEKYLL_CONF and LOCAL_FOLDER are ones of mine.
I don’t have tests (yet), but I could have run them in the before_script phase, for example. If they’d fail, my job would also fail. The build and deploy phases would not occur.
At the moment I use HTMLProofer to check the HTML validity (links, etc.).
$REMOTE_FOLDER is an environment variable.
Deploy
We are at the core of the job. Our content is ready, we need to deliver it onto our web server.
Travis offers a plethora of deployment strategies, to numerous providers like AWS or Heroku. But I want to deploy to my own provider, using rsyncthrough SSH. Fortunately, Travis provides features we can use to achieve that.
Using SSH implies having the private key available in the Travis build. But we don’t want having this highly sensitive information in the GitHub repository. Well, not in that form. So first, we need to encrypt the private key to make it readable only by Travis.
One-time configuration
The steps are:
Generate a new, dedicated SSH key
Copy the public key onto the remote SSH host (web server)
Encrypt the private key and add it to Travis
Commit the encrypted key in the repository
ssh-keygen -t rsa -b 4096 -C'build@travis-ci.org'-f ./deploy_rsa
# enter an empty passphrase
ssh-copy-id -i deploy_rsa.pub <user>@<host>
# check the public key is in ~/.ssh/authorized_keys
gem install travis
# login into Travis
travis login --org--auto# encrypt the private key
travis encrypt-file deploy_rsa --add
git commit -m"Add encrypted SSH private key" deploy_rsa.enc
The Travis CLI utility created an encrypted version of the private key and store the decryption key as an environment variable on Travis. It also added some lines to the .yml file which will decrypt the private key file during the build.
Job configuration
rsync is a powerful utility for efficiently transferring files between two computers. On macOS, the utility is available through HomeBrew. The package will be installed before our workflow kicks in, at environment configuration. Don’t forget to add these two new environment variables as well.
Same as before, notice the new environment variables. Add the three of them as “Repository Environment Variable”, with the proper values: $HOST, $USERNAME and $REMOTE_PATH.
You can now deploy automatically by pushing new content on the master branch, multiple times a day, and, avoiding any misfortune from using your own machine.
Isn’t that marvelous?
]]>Gaël Foppolome@gaelfoppolo.comThe secret keyword behind higher-order functions: rethrows2019-03-28T00:00:00+01:002019-10-01T23:01:04+02:00http://localhost:4000/the-secret-keyword-behind-higher-order-functions-rethrowsHigher-order functions are functions that take one or more functions as arguments. They are the cornerstone of functional programming, allowing us to write operators.
Let’s take an example.
funcperformArithmeticalOperation(_x:Int,operation:(Int)->Int)->Int{returnoperation(x)}funcdouble(_x:Int)->Int{returnx*2}performArithmeticOperation(4,operation:double)// -> 8// as trailing closureperformArithmeticOperation(4){$0/2}// -> 2
A function that can perform any type of arithmetical operation on Int.
Let’s assume an operator function might raise an error.
The compiler now rejects us when calling the high-order function, because the signature of performArithmeticalOperation does not match. We must update the performArithmeticalOperation signature and surround its calls with a do catch block. Yikes.
And we can’t call performArithmeticalOperation using the double function without a do catch block, even if we know the function will never throw! A lot of unnecessary boilerplate code to come.
Standard Library to the rescue!
Swift already embed quantity of higher-order functions and nevertheless we don’t need to surround their call with a try catch block. How is that possible?
Looking closely to their signature, you can notice a strange keyword, rethrows.
Only a quick section of our favorite book, The Swift Programming Language, mention it:
A function or method can be declared with the rethrows keyword to indicate that it throws an error only if one of its function parameters throws an error.
Using this keyword, the compiler is now able to check at compile time if the function parameter will throw an error. double will never, so it does not need a try catch block. You’ll even get a warning if you add it anyway.
]]>Gaël Foppolome@gaelfoppolo.comDecoding Array Gracefully2019-03-10T00:00:00+01:002019-10-01T22:57:13+02:00http://localhost:4000/decoding-array-gracefullySince the introduction of Codable, transforming APIs into data models has been a blessing. All we need is a simple conformance to the Decodable protocol, and let Swift do its magic.
But sometimes, we need more control. Quickly, we end up declaring our coding keys and overriding the default implementation of init(from: Decoder), to state our own business logic.
Eventually we’ll get exactly what we want. Well, almost exactly.
The issue
Let’s say we want to display a list of items, retrieved from an API.
A naive data model and a quick JSON mock. A PlanetarySystem with a list of Planet. The JSON data contains a list of PlanetarySystem.
Executing this code will throw a DecodingError.dataCorrupted, with the following, rather explicit, debug description.
And this is where the problem lies. We can’t be sure the data will be valid.
Decodable provides a great way to handle that when the data is a simple object, thanks to optional. But it does not provide one when the data is a list. We either get a full list of items, or an error, if any of the item does not conform to the item’s data model.
What if we want something in between? Like the list of valid items, the items that conform to the data model?
In order to achieve this, we need to build a fault tolerant system, one that will allow lossy decoding of array elements.
The idea
The way Decodaleworks when processing a collection is simple : it will throw as soon as one of the children’s collection throws. In our example, Decodable throws at the very end, when reaching the plutovalue. The value is not a part of the enum ; the decoding of that item and so the decoding of the collection. All the data process before is throw away. A fail strategy.
Our first step is to define new strategies. We start simple: either we remove the faulty element, or we apply the standard behavior (fail).
We then need to use the chosen strategy to apply when encountering an invalid element while decoding.
We’ll use a generic enum to represent it. The current decodeItem method will either:
The second step is a bit tougher. Our strategy is now defined, we want to use it, when processing a collection.
The key here is to rewrite ourselves the decode method of KeyedDecodingContainer, to use our strategy.
Hence, the method has the same signature as the standard with an additional parameter, our strategy. By default, the strategy is the standard one, throw an error.
The job is then as described earlier. We iterate over the container, try to decode our object using our strategy :
if we have an element, we keep it, and we continue looping over the container
if we don’t have an element
and the strategy is removing : nothing happens, we continue looping over the container
and the strategy is failing : we throw, as usual, and the decoding stop
extensionKeyedDecodingContainer{privatestructEmptyDecodable:Decodable{}publicfuncdecode<T:Decodable>(_type:[T].Type,forKeykey:KeyedDecodingContainer<K>.Key,invalidElementStrategy:InvalidElementStrategy<T>=.fail)throws->[T]{varcontainer=trynestedUnkeyedContainer(forKey:key)vararray:[T]=[]while!container.isAtEnd{letelement:T?=tryinvalidElementStrategy.decodeItem(decode:{trycontainer.decode(T.self)})ifletelement=element{array.append(element)}else{// hack to advance the index_=try?container.decode(EmptyDecodable.self)}}returnarray}}
Updating our example code, and we have a rather simple fault tolerant decoding system.
Executing this code will throw the exact same error as before. And same as before, we would need to create a new method, in JSONDecoder this time, to have something like this :
Unfortunately, we hit the limit of our possibilities. In order to decode the Data we would need access to the internal _JSONDecoder type, which is… internal. Without it, we cannot do more, unless rewriting our own JSONDecoder, which would be a terrible mistake and a waste, if you ask me.
What you can do
Since September 2017, an issue about this subject is open on the Swift bug tracker, SR-5953. Unfortunately, not much has been made since. So, instead of trying to write your own decoder and if this issue is important to you, feel free to upvote and comment on the issue!
]]>Gaël Foppolome@gaelfoppolo.comIt’s that Week of the Year2018-12-29T00:00:00+01:002019-10-01T23:25:32+02:00http://localhost:4000/it-s-that-week-of-the-yearAs of most years, this year ends in the middle of a week. And according to the date format you are using, it will not display the same date value during these last few days.
It’s the perfect time to remind everybody that date formatting can be tricky, if you are not looking closely enough.
"29 Dec 2018 at 00:00" (datey)
"25 Dec 2017 at 00:00" (dateY)
Notice the date format: the first use y , known as year calendar and the latter Y, known as year-week calendar.
ISO year-week calendar
As defined in ISO 8601, a year-week calendar has 52 or 53 full weeks. Meaning a year has either 364 or 371 days instead of the usual 365 or 366 days.
The first ISO week of the year is calculated according to a bunch of properties, and in the end, can begin from 29 December to 4 January. The minimum days in a week is 4 and first day of the
week is Monday, according to ISO 8601 specifications. You can retrieve these values from minimumDaysInFirstWeek and firstWeekDay.
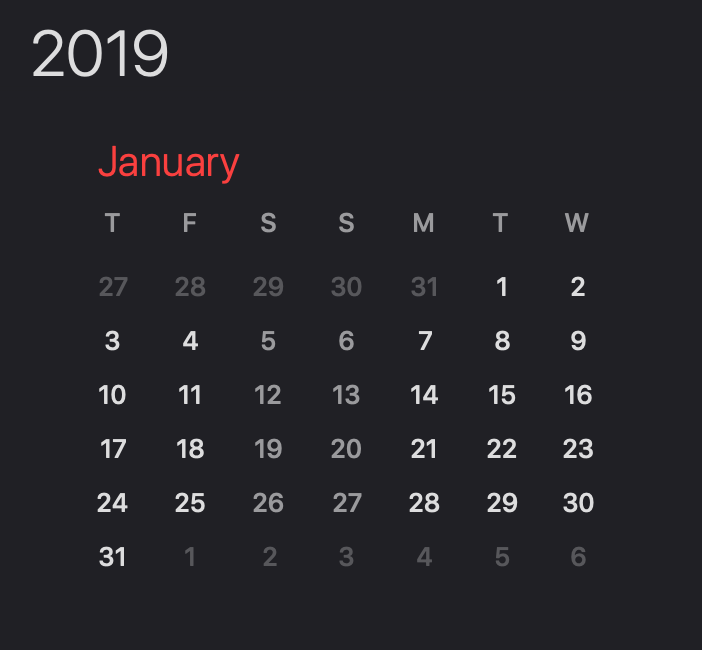
For example, 1 January 2019 is a Tuesday. Then the first year-week of 2019 starts on 31 December 2018 and ends on 6 January 2019.
January 2019 starts on Tuesday
However, if the first day of the week was Thursday, then the first year-week of 2019 would have started on 3 January, and would have ended on 9 January. The first two days of 2019 would have then been part of year-week 53 of 2018.
January 2019 starts on Thursday
ISO year 2019 starts in year 2018, meaning the first ISO week of 2019 is also considered as the week 53 of ISO year 2018.
ISO year-week date format
Using the Y date format, you specify the year-week date format, which needs additional components from the same year-week date format. d and M are respectively day of the month and month, but in year based date format. This is why the formatter ignores both of them and only consider the Y.
Without any other configuration, the formatter only consider the year, in a year-week calendar, and by default uses a zero based index for the day and the week: day 0 of week 0 of 2018 is 25 December 2017.
December 2018
When using year-week date format, use w to specify the week of year (ordinal) and e to specify the day of week.
We changed the date format but forget the date representation! The formatter is now using year-week date format ; what it reads is: day 1 ($29 \bmod 7 = 1$) of week 12 of year 2018. And this is 19 March 2018.
We need to update the date representation to respect that format.
letdateY=formatterY.date(from:"6-52-2018")
Day 6 of week 52 of year 2018. Finally!
y vs Y
Typically you should use the calendar year format, y. Y should be used only when you specifically need to work with an ISO week date system. This can be the case for fiscal years.
Also, you should only use y and not yyyy. Unicode Technical Standard #35 explains this causes a forced padding, which you want to avoid if you work with non-Gregorian calendar. Using y will also enable forward compatibility.